
Compton Wood Flooring has more than 20 years of wood floor refinishing work behind it, and we bring that experience to houses in Compton, CA, serving surrounding cities including East Rancho Dominguez, Willowbrook, West Rancho Dominguez, Lynwood and Watts. Most of the floors we refinish here are original three-quarter-inch oak strip or older Douglas fir, laid when the houses were new and sanded some number of times since. Our first job on every estimate is finding out how much wood is left and what is sitting on top of it.
Refinishing is not one service but a range. At one end is a screen and recoat that refreshes a sound finish in a day; at the other is a full sand down to fresh wood, a color change, board repairs and three coats of new finish. We recommend the lightest treatment that actually fixes the floor you have, and we explain why before any sander comes off the truck.
Every finish we apply is legal to use in the South Coast air basin, and in houses built before 1978 we use lead-safe practices around painted trim. Those two rules shape how we work on almost every job in Compton, so they are built into the price rather than added later.
Full Sand and Refinish for Hardwood Floors
When a Full Sand Is the Right Call
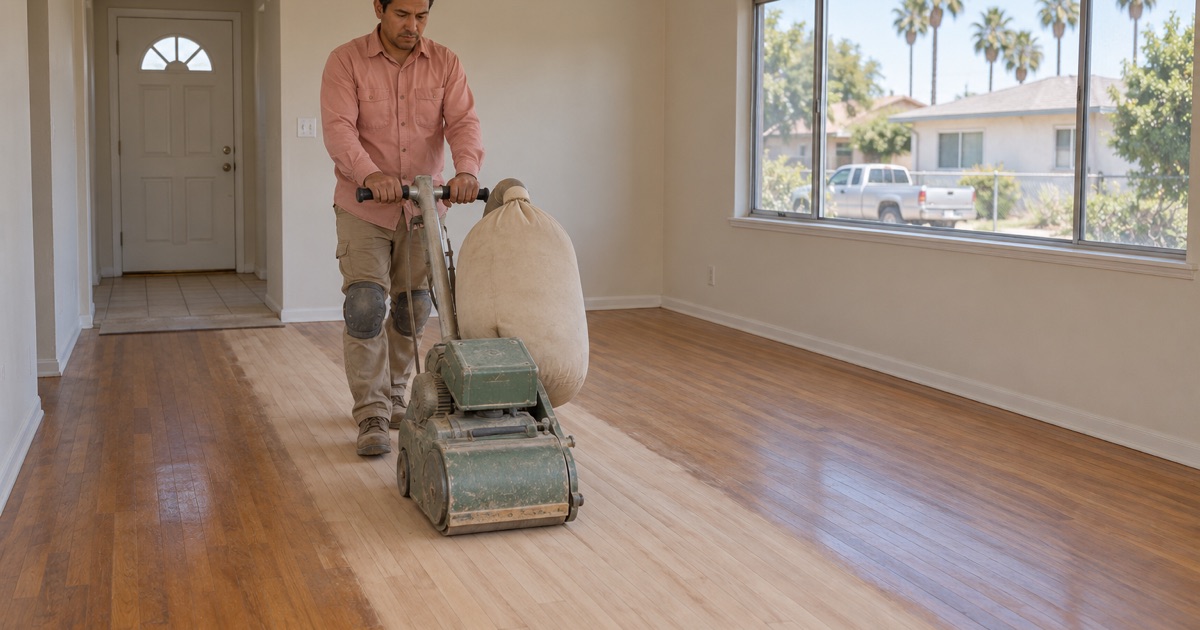
A full sand removes the old finish and a thin skin of wood, taking out scratches, gray traffic lanes, water marks and uneven color. It is the right choice when damage has reached the wood itself or when you want to change the stain color. It is the wrong choice when the floor only looks tired, because every full sand spends wood the floor cannot grow back.
We make that call floor by floor rather than room by room. A dining room with a worn path may need sanding while the bedrooms off the same hallway only need a recoat, and we price them separately so you are not paying for more sanding than the house requires.
Drum Sander, Edger and Grit Sequence
The main field of the floor is cut with a drum sander, the perimeter with an edger, and the whole surface is blended with an orbital sander so no machine marks show under the finish. Each pass moves up the grit sequence, from a coarse paper that removes old coatings to a fine paper that leaves the grain ready for stain.
Skipping a grit step is how chatter marks, swirls and dips end up visible once the finish goes on. We take the extra pass, because a missed step cannot be fixed without sanding the floor again.
Dust Control While We Sand
We run a dustless sanding system that pulls fine dust into a collector rather than letting it settle on cabinets and closets. That matters in any house, and more so in a pre-1978 one, where old painted baseboards and shoe molding may hold lead. We contain and clean with that in mind so dust from the floor does not become a problem somewhere else.
Screen and Recoat for Worn Finish
What a Recoat Can Fix
A screen and recoat lightly abrades the existing finish with a buffer and fine screen, then adds a fresh coat of polyurethane. It restores sheen, fills fine scuffs and adds a new wear barrier without touching the wood. On a floor that was sanded properly within the last several years, it is often all that is needed.
It is also the gentlest option for a floor near the end of its sanding life. Adding a new coat of finish uses no wood at all, which can buy many more years before any board replacement is needed.
When a Recoat Will Fail
A recoat only bonds to a clean, compatible finish. Floor wax buildup, silicone-based polishes and some grocery-store floor restorers leave a film that new polyurethane peels away from within weeks. We test for contamination on every recoat candidate, and when a floor fails the test we tell you it needs a full sand rather than applying a coat that will not hold.
Stain Color and Finish Choices
Taking Out Orange Oak
Many red oak floors in Compton turned amber or orange as older oil-based finishes aged in the sun. A full sand takes that color away, and from there we can leave the oak natural, stain it a neutral brown, or tone it toward gray. We sand and stain sample patches on your floor first, because the same stain looks different on red oak than it does on white oak or fir.
Avoiding Blotchy Stain on Fir and Maple
Some species take stain unevenly, and Douglas fir is one of the worst offenders, going blotchy in the soft grain and staying pale in the hard grain. We usually recommend a clear finish on fir or a conditioner before any color. On oak we pay close attention to the final grit, since a floor sanded too fine will not absorb stain evenly either.
Waterborne, Oil-Modified and Hardwax Oil Finishes
SCAQMD Rule 1113 caps wood coatings at 275 grams of VOC per liter, and every product we use meets that limit. Waterborne polyurethane dries clear and fast with little odor, oil-modified polyurethane adds a warmer tone and a longer working time, and a hardwax oil finish soaks into the wood for a low-sheen look that can be spot-repaired later.
Each one wears differently under kids, pets and kitchen traffic. We match the finish to how you actually use the room, then pick a sheen level, usually satin or matte, that hides everyday dust and fine scratches.
Our Step-by-Step Wood Floor Refinishing Process
Step 1: Measure Thickness and Test the Finish
We start by pulling a floor vent or threshold to measure how much wood is left above the tongue, and we read moisture with a wood moisture meter in each room. We also test the existing finish for wax and contaminants. Those readings decide whether the floor gets a recoat, a full sand or repairs first.
Step 2: Repair Boards Before Sanding
Damaged, stained or loose boards are replaced or refastened before sanding starts, so the new wood is sanded flat with the rest of the floor. Gaps are filled where they are stable, and old floor furnace patches or plywood squares are replaced with proper woven-in boards. Sanding over a bad repair only makes it more obvious.
Step 3: Sand, Stain and Seal
We sand through the grit sequence, vacuum and tack the floor, then apply any stain and a sealer coat. The first coat is where the color locks in, so we check it in daylight and lamp light before moving on.
Step 4: Finish Coats and Cure Instructions
We apply the finish coats with a light abrasion between each one, then leave written cure instructions that name when you can walk, move furniture and put rugs back. Following those times is what keeps the finish from marking in its first weeks.
- 20+ Years of Wood Flooring
- Written Scopes and Estimates
- Free Estimates